Pancakes sans Baking Powder

So, if you’re anything like me, you may have a couple of children wandering along with you at the grocery, complaining about how looooong it takes to buy the food required to feed a small army.  AND these distractions are a big reason you forget important little items.

Aw.  Who am i kidding?  If it’s not on the list it might as well not exist (and sometimes even when it IS on the list).

So, when I ran out of baking powder after making our last batch of pancakes I thought to myself, “Don’t forget to add baking powder to your grocery list!”

Then I promptly forgot.

Until this morning, when I opened the cupboard while the soundtrack of starving children moaned on and on in the other room, and I suddenly remembered I would not be finding any baking powder there.

But I did not throw in the towel.  I knew there must be a substitute for baking powder.  I considered adding another egg, but figured that would make the pancakes too dense & tough.  So to my trusty laptop I raced!

A quick search revealed that I could create a suitable leavening agent by combining approximately 1 part baking SODA to 2 parts cream of tartar.  What are the odds I would have cream of tartar, which I only use to make an occasional meringue, when I didn’t  have baking soda, which I use about once a week?

Back to the cupboard where low & behold…  A nice full jar of cream of tartar!

Now, I was a bit skeptical, but the resulting pancakes were so marvelously airy & just plain yummy, that I knew I could never go back to using baking soda.  I may even start substituting the baking soda/tartar combo in my cookie recipes!

I added chocolate chips once I'd gotten each pancake on the griddle.  The kids are no longer starving!

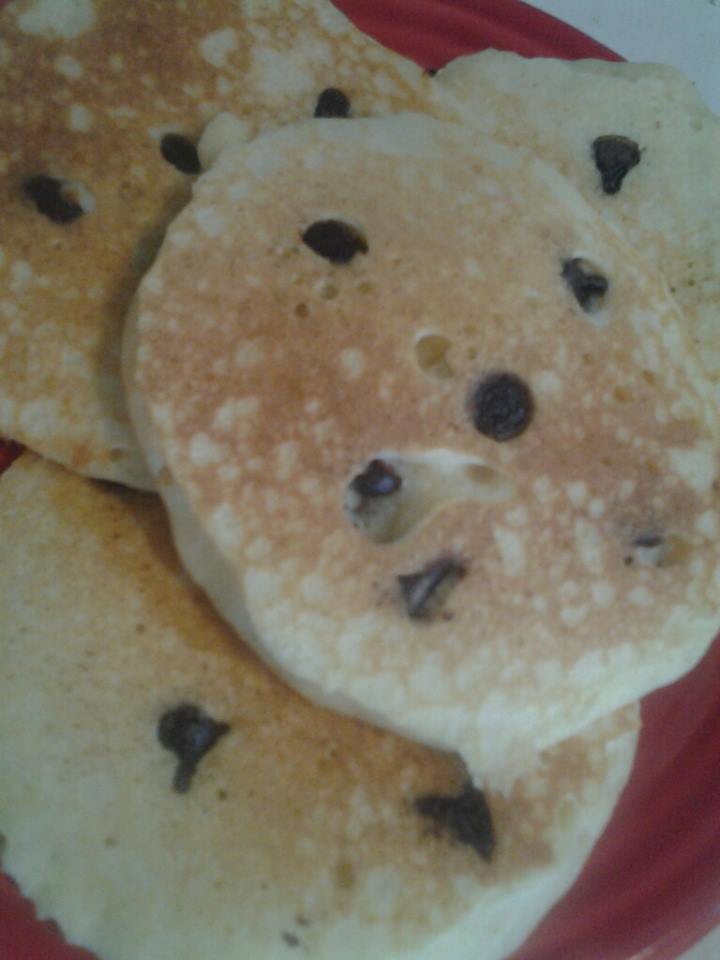
I added chocolate chips once I’d gotten each pancake on the griddle. The kids are no longer starving!

If you are interested in making your own Baking Powderless Pancakes, here’s my recipe:

2 1/2 c.    Milk
6 T.          Unsalted Butter
2              Eggs
3 c.          Flour
2 T.          Sugar
4 t.          Cream of Tartar
2 1/2 t.    Baking Soda
1 t.           Salt
Cooking oil for your pan.

I heat the milk & butter just enough to melt the butter, and beat the eggs into the liquid mixture (temper the eggs if you got the milk & butter too hot).  Combine dry ingredients and whisk in the liquids just enough to blend.

Oil your griddle and heat to ~375.  Add batter by 1/4 c. fulls to your hot pan and flip when the bubbles begin to stay open in the middle and the edges start to lose their wet shine.

Add blueberries or chocolate chips if you like!

Using a quarter cup measure to dip out the batter should make about 36 palm sized pancakes.

Enjoy!

They Did It!

We left the last few eggs with two of our broody geese.  Pilgrim geese are supposed to have good parenting abilities – so we thought we’d give them the chance to prove it.

So far 2 goslings have hatched out of 4 pipped eggs and at least one more is in the process of hatching.  Unfortunately, the two that didn’t make it were accidentally squished by the mommas.  I think this is a result of both inexperience and the fact that they both decided to make one giant nest and set together.  Makes it hard to tell where it’s safe to place those giant feet!

So the excitement is tinged with some disappointment, but the two babies are doing wonderfully!  Diamond, our gander, seems proud beyond measure, and even the Auntie goose, Felicity, is very lovey to the goslings as they have begun to explore the big green world.

Pilgrim Goose mothers and their goslings.

Bones & Stone with their little goslings in their giant nest. We are very pleased with our momma geese here at Brown Fox Farm!


Sting Me Once, Shame On Me…

Sting me repeatedly, shame on you!  Especially if we’ve been kind enough to try to avoid the ground nest you’ve created in the middle of our garden.  For more than a year. 

This is a PSA – a public safety announcement. 

I know that bees are the most magnificent pollinators.  I know that bees are having a very difficult time due to CCD.  I know that honey bees are not aggressive.  But I’m here to warn you about the Common Eastern Bumblebee.

Image

This Eastern Bumblebee, Bombus impatiens, was found by our shed after a freezing rain in late March. We kept it for my daughter’s 4-H entomology project, but it is a good example of the size and coloration of these aggressive bees.

The Eastern Bumblebee creates it’s colony in a hole in the ground.  They tend to prefer areas with mowed grass, open ground & bare earth.  We have all of these conditions in our garden area.  They consume pollen & nectar & so will take advantage of areas with flowering plants. This means they are great pollinators.

However, they are also quite aggressive when they feel their territory is being invaded & multiple bees will attack the invader(s) with painful, repeated stings.  Unlike honey bees, the Eastern Bumblebee’s venomous stinger is not barbed, so they can sting over and over again.  They will attack people and pets within a large radius of their nest. 

We spent all of last summer being attacked when ever we tried to tend the garden or mow in the vicinity.  On more than one occasion they chased us into the house, more than 200 feet from their nest, after walking in the yard 50+ feet from the hole.

I am posting this information because I am very frustrated with all the entomology/insect/gardening related websites claiming that these are docile insects & insisting that people are misidentifying the creatures that are terrorizing them in their own yards and gardens.  These are bumblebees, they live in the ground, they can sting multiple times and they are aggressive if you happen to live in the area near their selected nest site.

I have felt completely helpless, trying to find a way to encourage these bees to remain calm, or find a new home & today, after numerous flybys while watering the animals near the house, I decided that I am willing to resort to chemical means.

So I went online once more, trying to find advice on how to permanently get rid of the little bastards & found one last ditch possibility…  Please let it work, because I DO NOT want to poison them.  I just want them to move off far enough that they will feel safe & not feel the need to attack us.

The plan is to flood them out.  We tried this in the past, but apparently not for a long enough time.  It can take almost a week of repeated flooding of the nest for them to decide to move on to greener, or at least drier, pastures.  I haven’t seen them at a particular hole yet, but I am flooding last year’s nest area & will continue to do so for the next 5-7 days.  In the case of those with an active nest, please wait until evening & run your hose at night to avoid being attacked by active bees.

Here is a link to the forum where I found the detailed idea: 

http://forums2.gardenweb.com/forums/load/organic/msg071022556900.html

Take note of all the people insisting to the original poster that she must be confused about what sort of insect she is dealing with, and that bumblebees are not aggressive.  The truth is, if you encounter an Eastern Bumblebee on a flower somewhere far from it’s nest, it probably wouldn’t be aggressive unless provoked.  But they are VERY territorial and they are eager to attack if you have the misfortune of stumbling into the area around a nest.

And that concludes my Public Safety Announcement.  Wish me luck and say a little prayer that the bees move on so I don’t have to resort to something loathsome.

A Very Productive Weekend!

This weekend we pulled out all the fence posts from one fence row and built a new fence to expand the pasture for the sheep. That took all of Saturday and part of Sunday.

Here's the new fence and the happy sheep.

Here’s the new fence and the happy sheep.

Next I dug up four grape vines that were succumbing to overspray every spring from the field to our South. I moved them to our new “vineyard”, where they will hopefully be safe, along with the 6 new vines I planted. The varieties are Mars, Himrod, & Canadice.

Ten little grape vines, all in a row.

Ten little grape vines, all in a row.

Next I turned up the soil for our new raspberry patch. This will be just North of the Silkie chicken pen. They are Heritage variety red raspberries & the patch is a arch shape, at the center of which I hope to put a fountain someday.

All cozy in her new home!

All cozy in her new home!

Then I was plum worn out & decided to just wander around and enjoy the sights…

The asparagus is coming up nicely.

The asparagus is coming up nicely.

The kitchen salad garden is off to a very nice start.

The kitchen salad garden is off to a very nice start.

The ducklings are enjoying the sunshine on this beautiful day.

The ducklings are enjoying the sunshine on this beautiful day.

And now it's time for everyone to have a nap.

And now it’s time for everyone to have a nap.

Sourdough Starters from Scratch

Sourdough starter experiment progress.  Days 4 and 5

(clockwise from top) Whole Wheat starter, Bleached All Purpose starter, Unbleached All Purpose starter.

Today is day 5 for my starter (bleached, all-purpose wheat flour) and day 4 for my son and daughter’s starters (whole wheat & unbleached wheat flour respectively).

I kept reading recipes that said to only use unbleached flour or combinations of unbleached & rye or whole wheat flours.  But when I began my quest to learn to create my own starter with just flour & water, I only had bleached all-purpose flour.  So I went for it.

My starter is on day five.  It has gone from a stretchy batter (slightly thicker than pancake batter) to a thinner frothy batter consistency.  The smell has improved dramatically.  I noticed yesterday the distinct & pleasant “sourdough” odor – compared to the first 3 days, when I could only describe it as a sour “bad bell peppers” smell.  Here’s a photo of my starter.  We call it Bob.

Image

“Bob” bleached all purpose wheat flour starter, day 5.

My son chose whole wheat flour to base his starter on.  It is a little harder to get a good consistency with this one.  We have to add a bit more water to get it to that batter consistency & then it separates pretty rapidly.  It was bubbling very aggressively in the first 2 days.  But that has really died back, the bubbles are now small, but constant.  The smell – to me is unpleasant.  My first thought, when I open the container & before stirring, it that it smells a bit like vomit.  But we’re not giving up yet…  Mine smelled pretty bad to start with, too.  Here’s a close up of the tiny bubbles in his whole wheat starter & then a photo of the rapid separation:

Image

My son’s, as yet unnamed, whole wheat sourdough starter. Day 4.

Image

Whole wheat starter separation, less than an hour after stirring.

My daughter is using unbleached all purpose flour for her starter.  To me, hers has smelled better than both the others from the very beginning.  It also started getting the frothy bubbles sooner than the bleached flour.  She has dubbed her starter “Fred”  & here is a photo: 

Image

“Fred” – Unbleached all-purpose wheat flour sourdough starter. Day 4.

The steps we have followed so far:

  1. 1/2 c. flour & just over 1/3 c. warm water – mixed thouroughly in a tupperware container with a lid that can be left loose on a corner.
  2. Place in a warmish spot (for us this is on the top of our egg incubator) and stir a few times a day.
  3. Second day, repeat the first step & mix with the original starter. Continue to stir through the day.
  4. Third day, measure the starter and use an equal amount of the fresh batter mix to feed your starter.  For us this came to 1 c. flour & just under a cup of water.  Stir as before.
  5. Fourth day.  Repeat the addition of an equal amount of food to the existing starter.  Stir as before.
  6. Fifth day.  Repeat.  If your starter is getting too big for its container, transfer it to roomier accommidations or discard enough so you can double it up with the food batter again.  Stir as before.
  7. Future (up to about day 10-11) we will continue these steps & hopefully see some rising.  If all goes well we’ll have a nice smelling batch of starter to use for our first loaf of completely homemade sourdough bread.

We should be ready for baking on Easter weekend!  I’ll keep you posted.

My Letter to My Representatives & The President

The following is in regard to Congress’ passage of section 735 in HR 933.

“I am so disappointed.  

Once again industrial agriculture has purchased our government at the cost of the people.  I hope you take a moment to remember that these corporations, who wish to flout the court’s decision, continue to make money hand over fist without having to sell those seeds that were illegally approved by the USDA. Meanwhile honest farmers, who try to provide their neighbors with fresh raw milk, or those who simply want to save their own seed without worry that it has been contaminated by Monsanto’s genetically modified patented pollen, are being fined, arrested, harassed, & losing their livelihood.  

These are the people you are sworn to serve, the people you are supposed to speak for…  Not Goliath corporations who want to circumvent the law and purchase their way past the approval process.  Please remove section 735 from HR 933.”

Please – make your disappointment known!  Visit the link below and tell Obama to block the resolution & let your representatives know you are outraged at their disregard for the voice of the people.

http://action.fooddemocracynow.org/sign/stop_the_monsanto_protection_act_seize_congress/